|
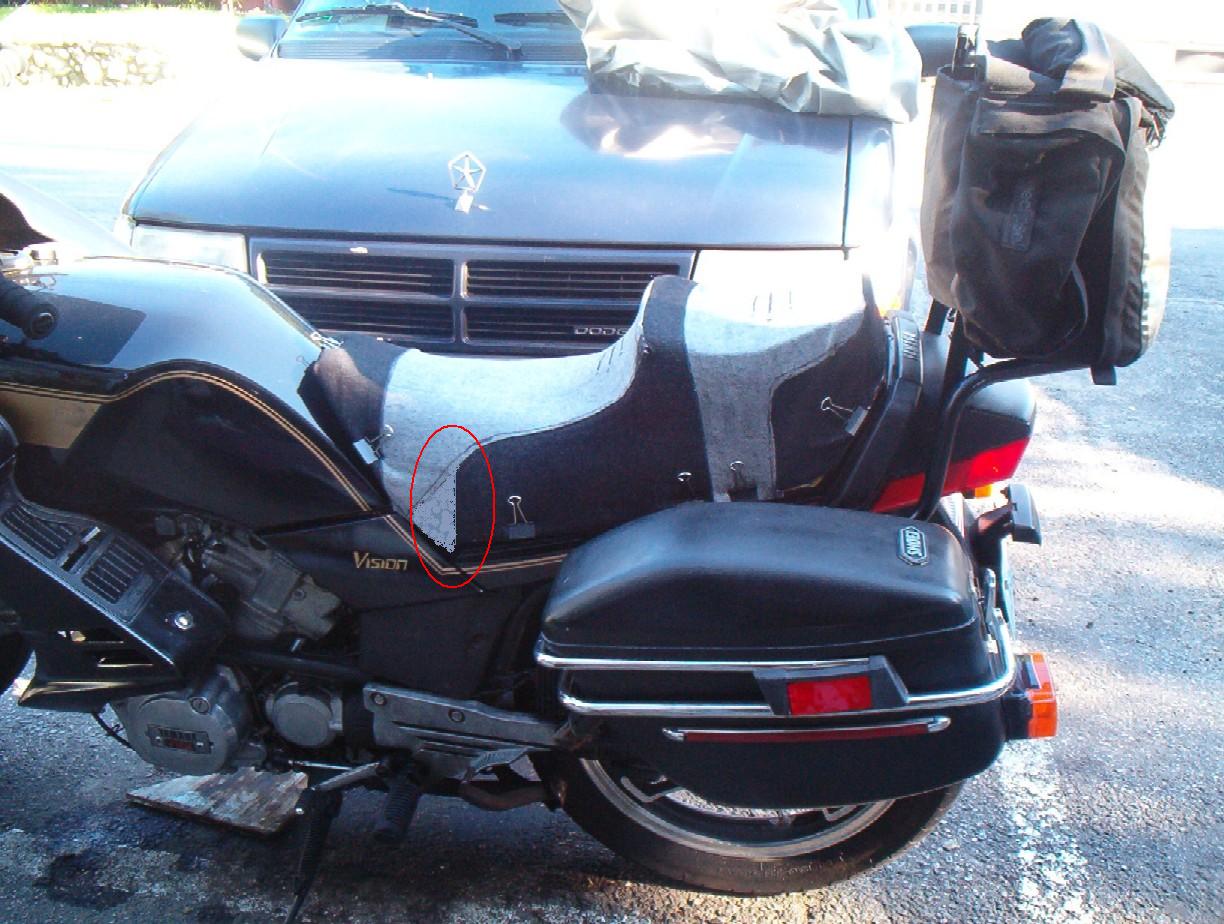
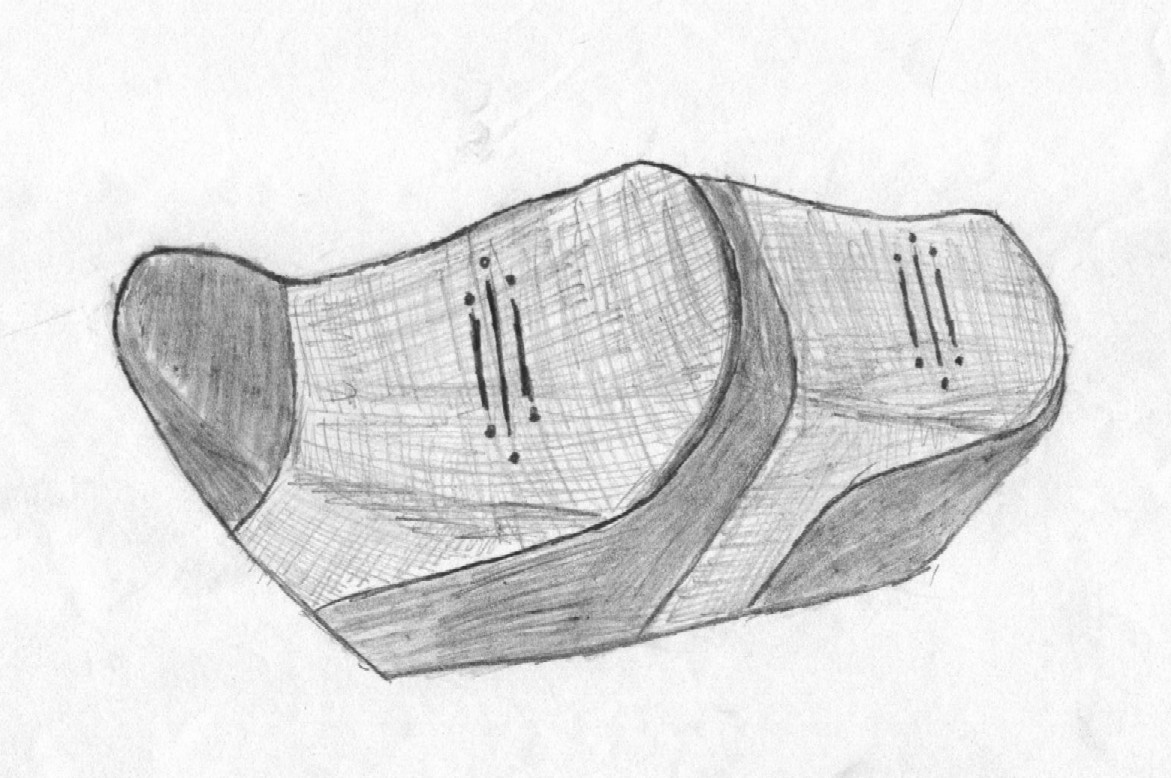
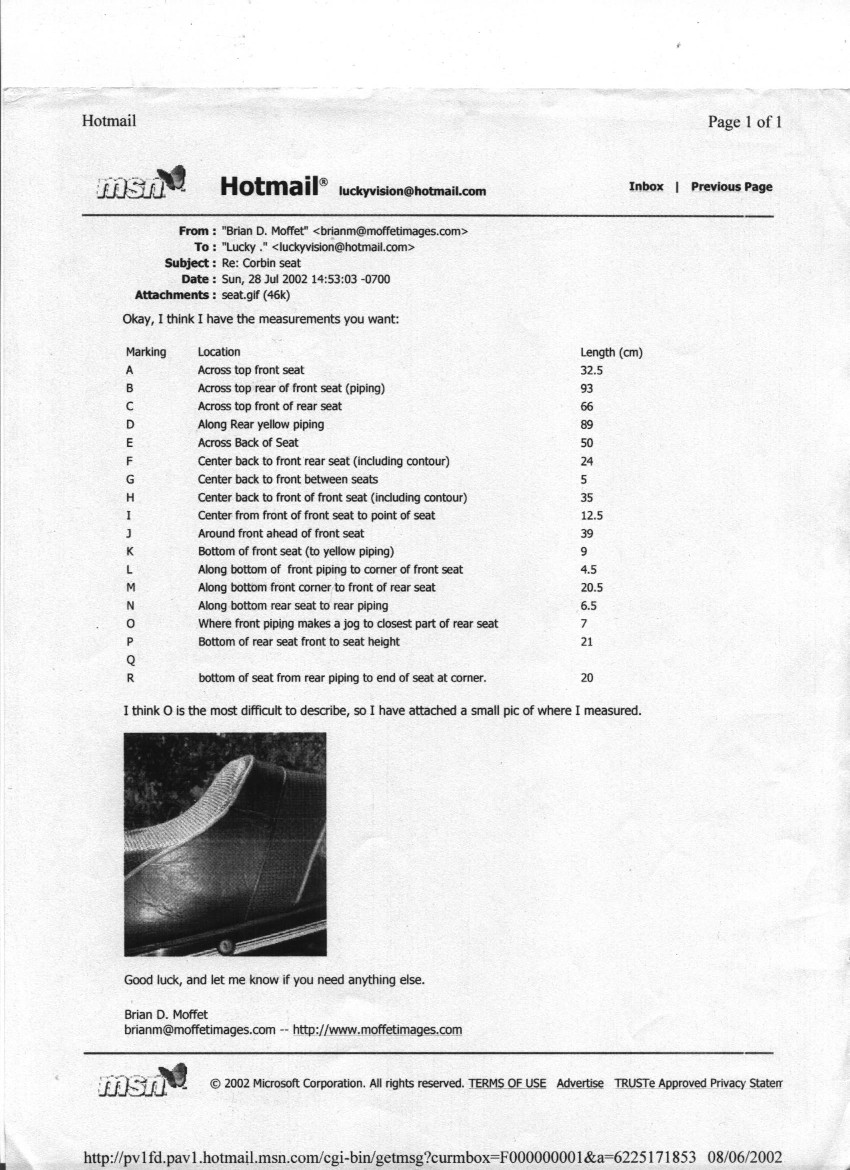
Brian was describing his Corbin seat in the Forum
a few years back, and he sent me a picture, I liked it so much
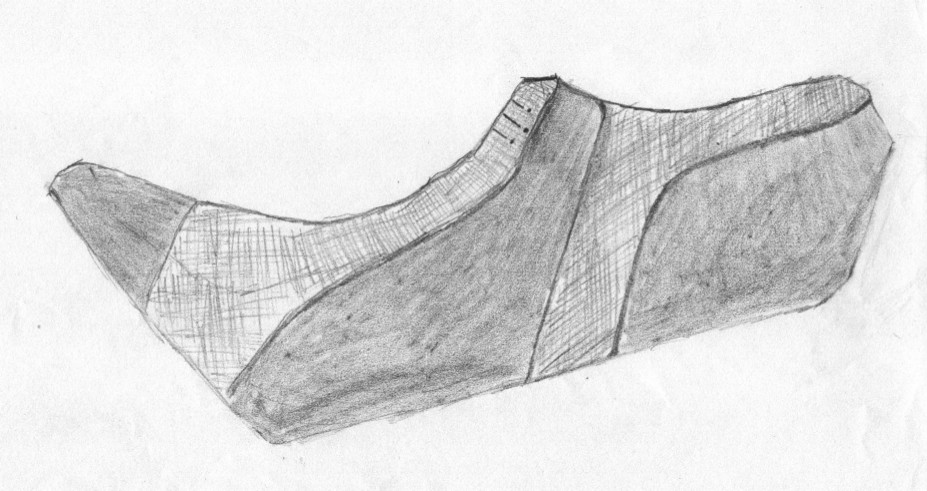
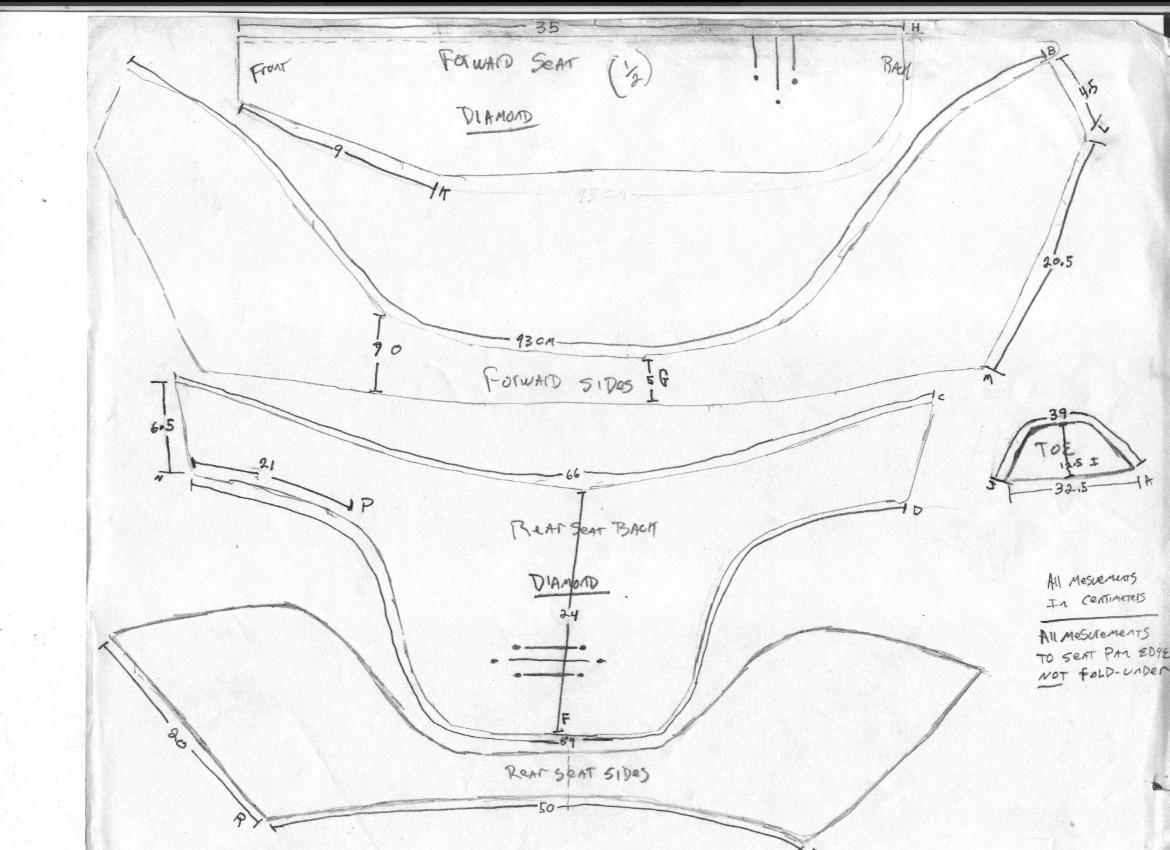
that I made a drawing of the sections. I sent the drawing to
Brian & he measured out the sections of the pattern. now
after a few years, I'm going to try to recreate it, with a little
bit of modification.
I want to do the lighter sections in black diamond
pattern, the darker sections in a natural black "leather".
and the piping in gold (to match the bike)
I found an upholsterer at a marina near me who does
boat seat cushions in the warm months, and snowmobile seats in
the winter. he gave me some tips on doing the seat.
Use floor glue to glue the foam blocks together
use an electric carving knife to shape the foam
put the shaped foam in a garbage bag and suck the
air out of the bag, this will make it easier to staple the cover
to the pan. Let the air back in to the bag, inflating it, when
your almost done stapling the cover to the pan. The smooth plastic
will help the foam slide into place, and help keep water out.
use a good quality staple gun.
buy enough material to do the job twice, and expect
to. use the first pattern to learn from, so the second one comes
out better.
PROGRESS UPDATE:
I went back to the upholsterer a few months later
(this project was on hold for a while) and discussed it with
him again. He gave me some of the foam I needed to play with,
but this time he reccomended 3M Trim Adhesive Spray which I had.
As the vinyl I want runs $20 a yard, I decided to
make my "test pattern" out of denim, which I already
had. Also, I had a really hard time finding the diamond pattern,
but Dennis said that by stiching a 1/4" thick piece of foam
on the back he could make the pattern I wanted. This of course
would be extra. I decided to instead go with alternating sections
of grey and black material.
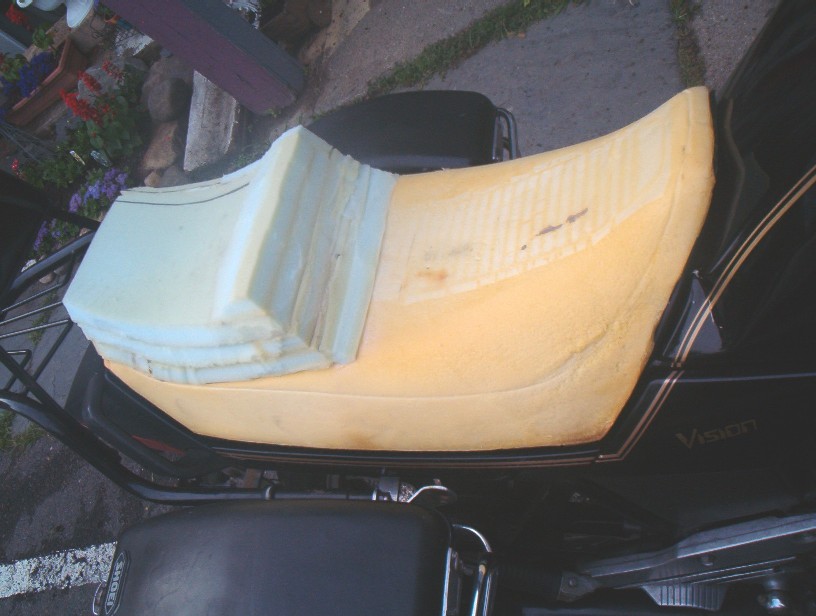
I spent a couple of hours gluing & triming the
foam to get the desired shape I wanted. it looks kind of hap
hazard, but this is ok since an additional 1/2" layer will
be placed over the top of the whole thing to smooth it out, and
account for compression when the cover is streched over it.
That night I made the denim cover, by test fitting
the pieces, starting at the front and working my way back. I'm
no wizard at the sewing machine, in fact I can't even sew a straight
line, but I know enough to be dangerous and after a few hours
got the test cover mocked up. Those binder clips came in real
handy for holding the cover in place and allowed me to get a
decent streach on it.
The next day I brought it back to show Dennis. He
was impressed at how close I got it to my drawings, and said
I earned one "Attaboy". I wasn't sure if he was kidding
because he has a very dry sense of humor, but he meant it. That
made me feel good. :)
He said that my pattern was close enough for him to
make a good cover and he would tweak it where it was needed to
keep it wrinkle free and give it nice rounded corners. We are
also going to adjust the front grey section a bit so that where
it turns down to the pan matches the rear section. (pic with
the red circle)
On the sections with the 3 lines in them, those lines
will be stiched to the 1/2" foam backing before it is glued
down. this will keep the cover from pulling away from the rest
of the foam.
The price for Dennis to finish the cover will be $100.
This is more than I have lying around, so it might be a while
before I can get the cover finished, but when I do i'll add that
to this page too.
--Lucky

|


|


