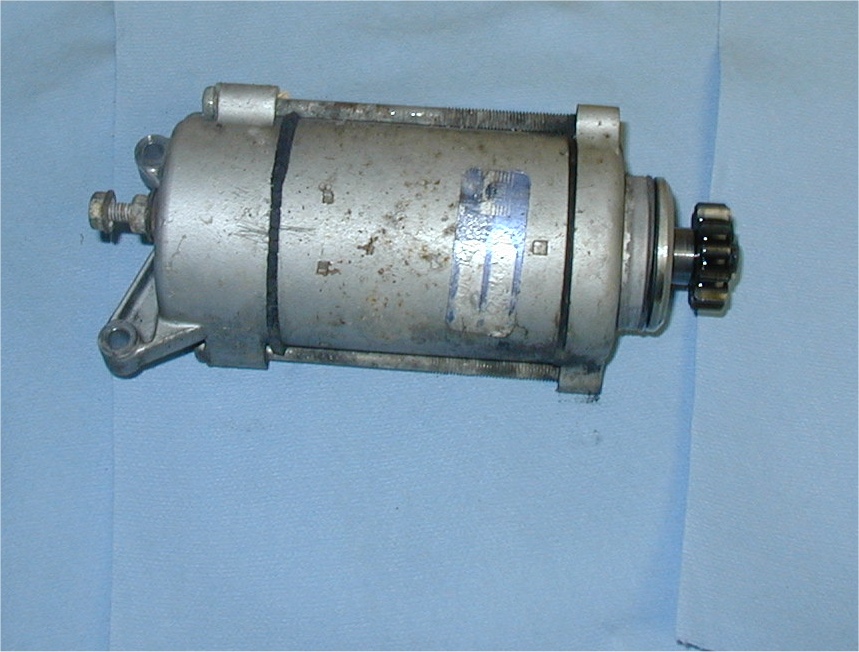
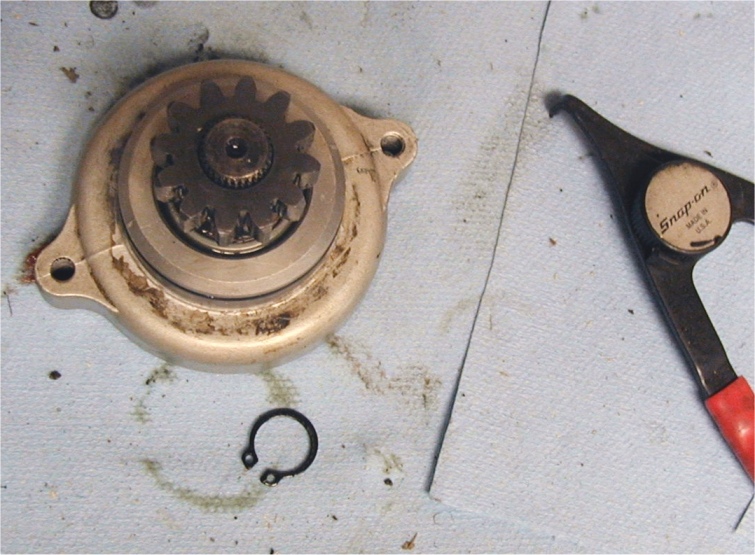
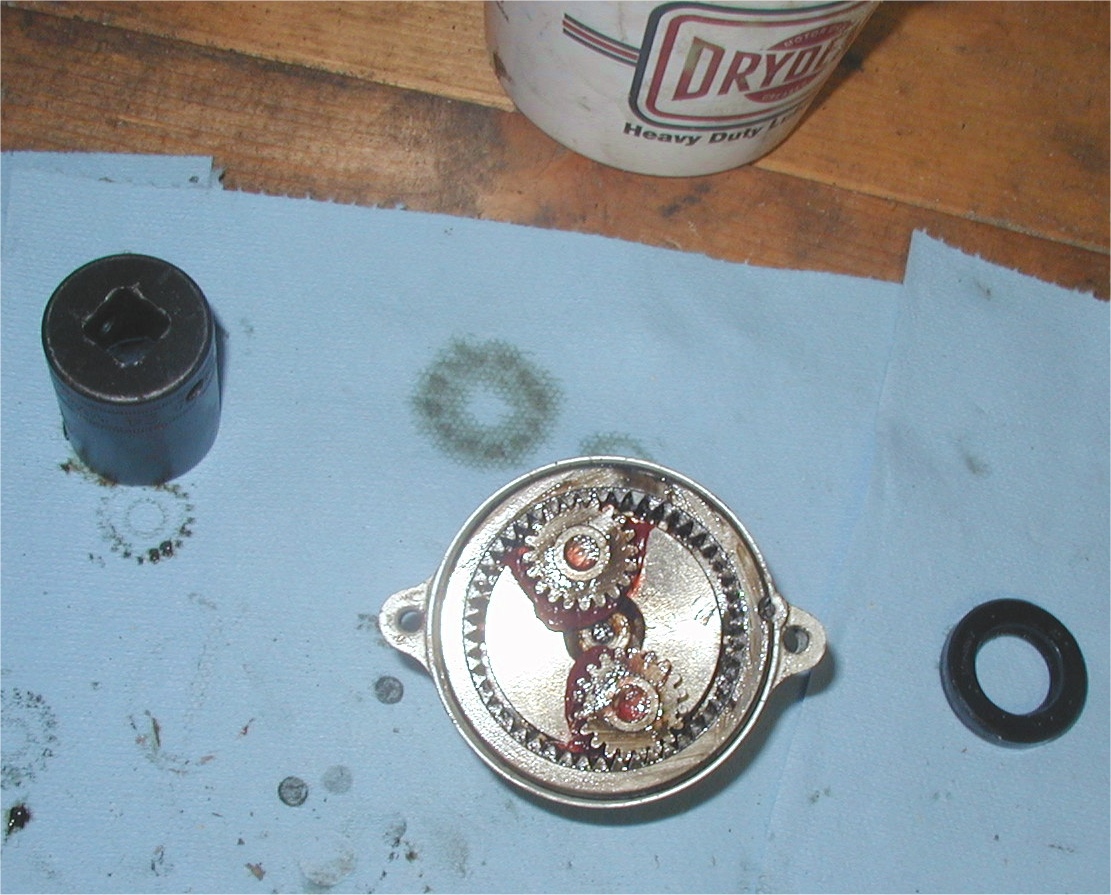
![]() |
![]() |
I'll put in a plug for Jason Morris here, A fellow Visionary, Jason does vision starter rebuilds. his email address is :jsmthefix@msn.com contact him for pricing etc. |
![]() |
![]() |
If you've gotten this far, congratulations, you probably just want to fix your bike. |
|
|
![]() |
![]() |
If you've got access to a workbench and a benchvise, it'll make the work go easier. Clamp the Starter snugly in your vise using a rag so that you don't damage the housing. the next thing you need to do is to remove the 2 long philip screws from the starter. depending on how corroded or tight they are will dictate how dificult this will be. For those of you without a vise, you may find it easier to temporarily put the starter back in the bike to actually loosen the assembly screws. if they are really being difficult, an impact driver should do the trick. |
|
|
![]() |
![]() |
The next step is to look at the rest of the starter and get it ready to go back together. Lets have a look at the commutator to see what kind of shape it's in. |
|
|
|
|
|
|
![]() |
![]() |
Once you've got it all assembled, you should be able to turn the starter by hand with some effort, It should turn smoothly without binding. Depending on how confident you are in your work, now would be the time to bench test it. a simple way is to get a pair of jumper cables and connect the red power lead to the electric lug on the starter, connect the ground to the battery and lastly touch the black negative cable to the starter. make sure you are holding the housing from moving around because it has a lot of torque and will want to spin away from you. The starter should spin quickly and smoothly. do not run it this way without a load for more than 10 or 15 seconds. If this checks out ok, you are just about done. |
![]() |
![]() |
The last thing you should check and or replace is the o-ring seal on the end of the starter, my suggestion would be to either order one from the dealer or hit up your local hardware\auto parts store to try and match it as closely as possible. you can be a bit small on this but the actual thickness is critical for not having an oil leak. once this is done, bolt that puppy back onto your bike, putting some grease on the aformentioned o-ring, slide it back in carefully as to not damage the seal, run the 2 fastening bolts back in, connect your battery, refill with fresh oil and you are done. |
![]() |
![]() |
Well, that is about it, my starter came out great, went back together like a charm and fired up on the first crank. I hope this guide works just as well for you.
-Ron |
![]() |
|
[Home] [What's New] [Gallery] [Technical] [Links] [Forum] |